With Windows Live Photo Gallery you need not worry about the view which is not fitting into your camera lens. You can expand your view by taking multiple shots and then superimpose them over each other to create a singe image with stretched view. Windows Live photo gallery comes with a wonderful feature to create photo panoramas with which, your field of vision isn’t limited to what you can squeeze into one photo. In Photo Gallery, you can "stitch" together several photos in a series to create a larger, more interesting composition.
In the past, taking panoramic photos required a special camera, lenses, or the use of complicated camera features. The only other option was to paste photos together by hand. Photo Gallery makes creating panoramic photos much easier and much more fun.
To create a panorama, install Windows Live Photo Gallery if you haven’t installed it already.
Creating a Panorama in Windows Live gallery :
-
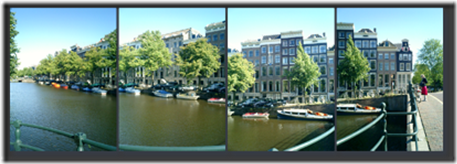
Take a series of photos that overlap a little. Here is an example using photos of Amsterdam.The four photos will be used to create the panorama

-
After you import the photos into Photo Gallery, select them by holding down the CTRL key while you click each photo.
-
Click Make, and then click Create a panoramic photo. Photo Gallery analyzes and adjusts the photos so they fit together smoothly.
-
Select a name and folder location for the panoramic photo.
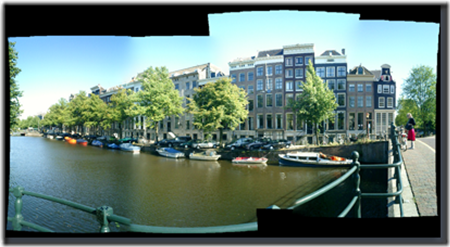
 The rough panoramic photo that Photo Gallery created from the sample photos
 -
The precision of the panoramic photo depends on the amount of overlap in the photos and the similarity of the lighting between the photos. Experiment with it a few times until you get a good feel for the type of photo scenes that stitch together best from your particular camera.
-
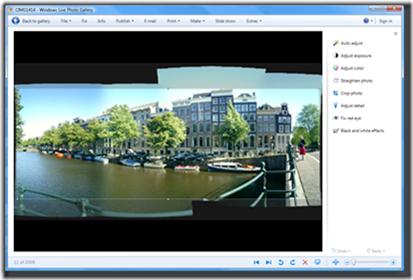
After the photos are stitched together, you can clean up the rough edges by cropping the photo. Click Fix, and then click Crop photo.
 Cropping the panoramic photo to clean up the edges and create a good composition
 -
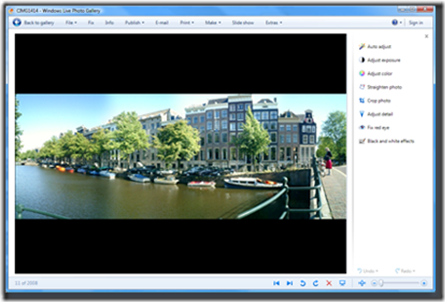
Select the section of the photo you want to keep and click Apply.
 Applying the changes to the panoramic photo
 -
When you’re finished editing your new panoramic photo, click Back to gallery to return to the gallery. Photo Gallery automatically saves the photo for you.

Nice and interesting. Keep blogging more