While working on a side project, I had a need to deploy a web app for a POC. Realized my existing GoDaddy hosting won’t be a good idea this time as I kind of hit the files threshold during migration of a WordPress repo to GoDaddy instance. A few months ago when working on the first iteration of Jarvis, I deployed it on Elastic Beanstalk, and this time again, Elastic Beanstalk came to rescue.
Elastic Beanstalk is a cloud deployment and provisioning service that automates the process of getting applications set up on the Amazon Web Services Elastic Beanstalk is one layer of abstraction away from the EC2 layer. It sets up an environment for you that can contain Amazon Elastic Compute Cloud (EC2) instances, Amazon Simple Storage Service (S3) buckets, and load balancers to manage the application architecture for you.
Found a pretty neat workflow diagram on AWS Elastic Beanstalk page
![]()
Here is how to you can deploy and run a web app on Elastic Beanstalk.
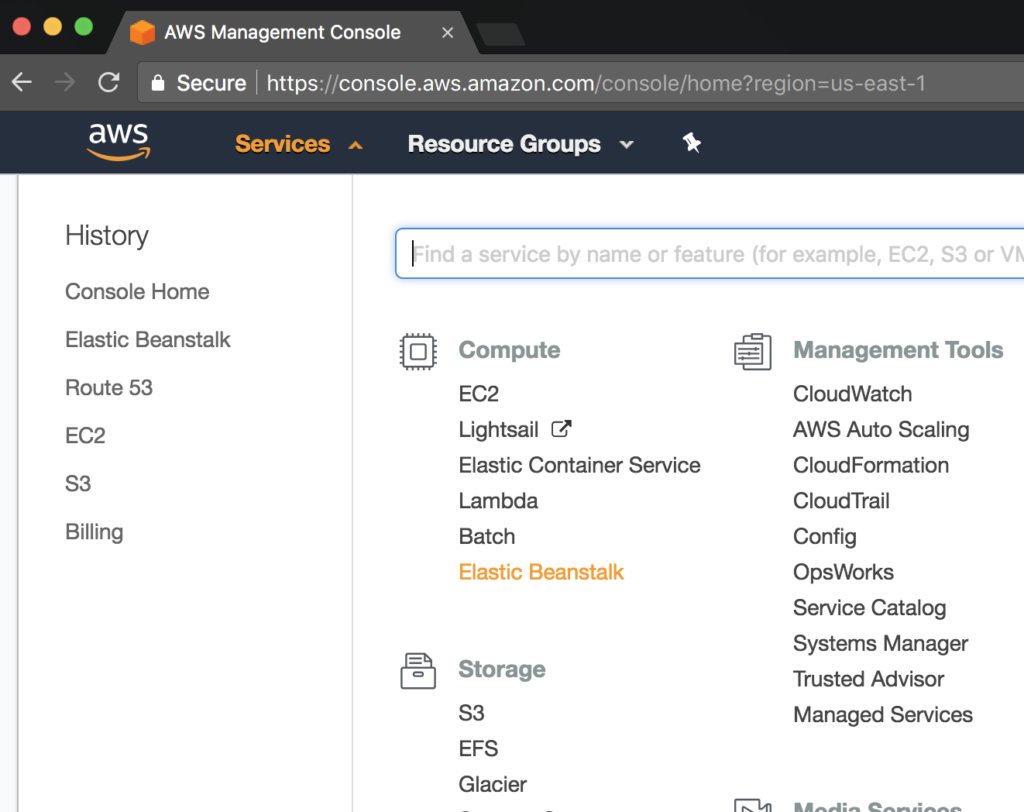
- If you don’t have an AWS account, you may need to create one. From the AWS homepage, select Elastic Beanstalk from Services menu in the top left corner.
- From the Elastic Beanstalk console, select Create Application with an Application name and details (optional) or choose an existing Application
- Once Application is created (selected), select Create environment from the Actions menu in the upper right corner.
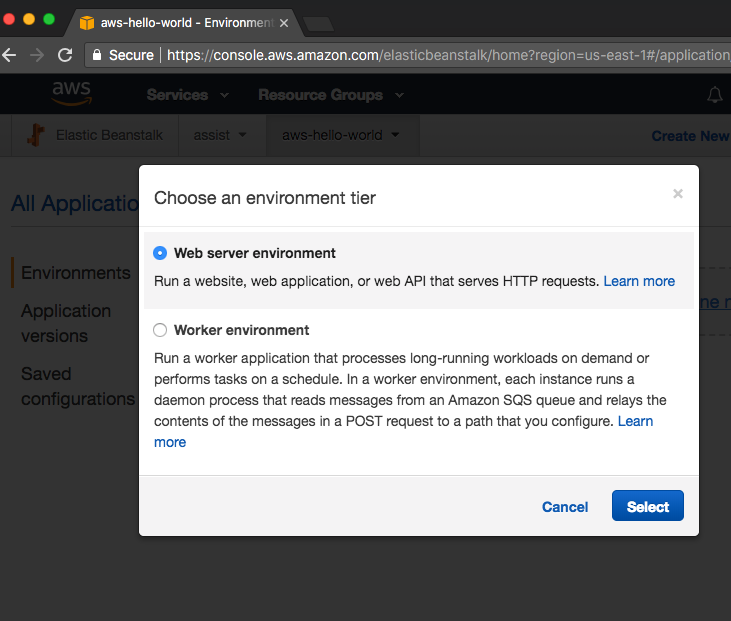
- You can either choose Web server environment or Worker environment. For creating a web application, choose former one. Environment tier configures and provisions the resources to support an application that handles HTTP requests or an application that pulls tasks from a queue.
- On the next page, you can choose a Platform that matches the language used by your application. You can either choose PreConfigured platform or Custom platform.
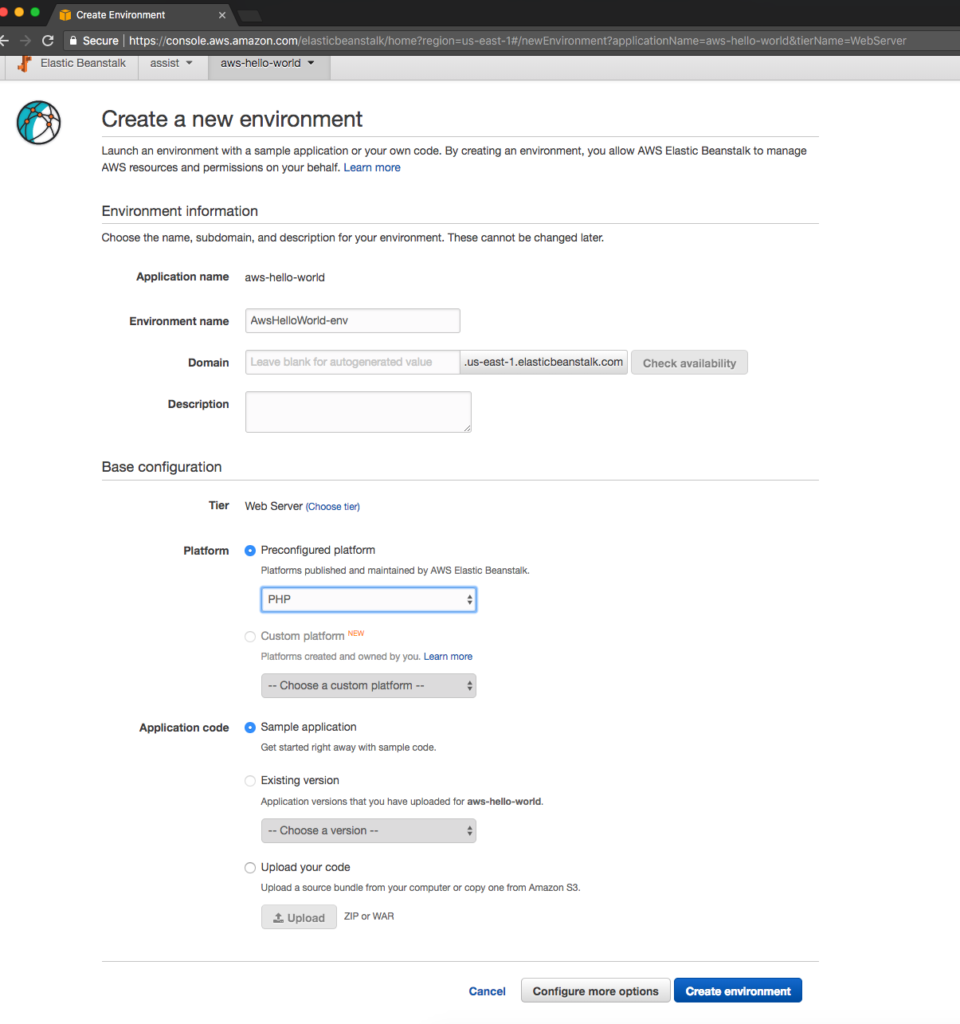
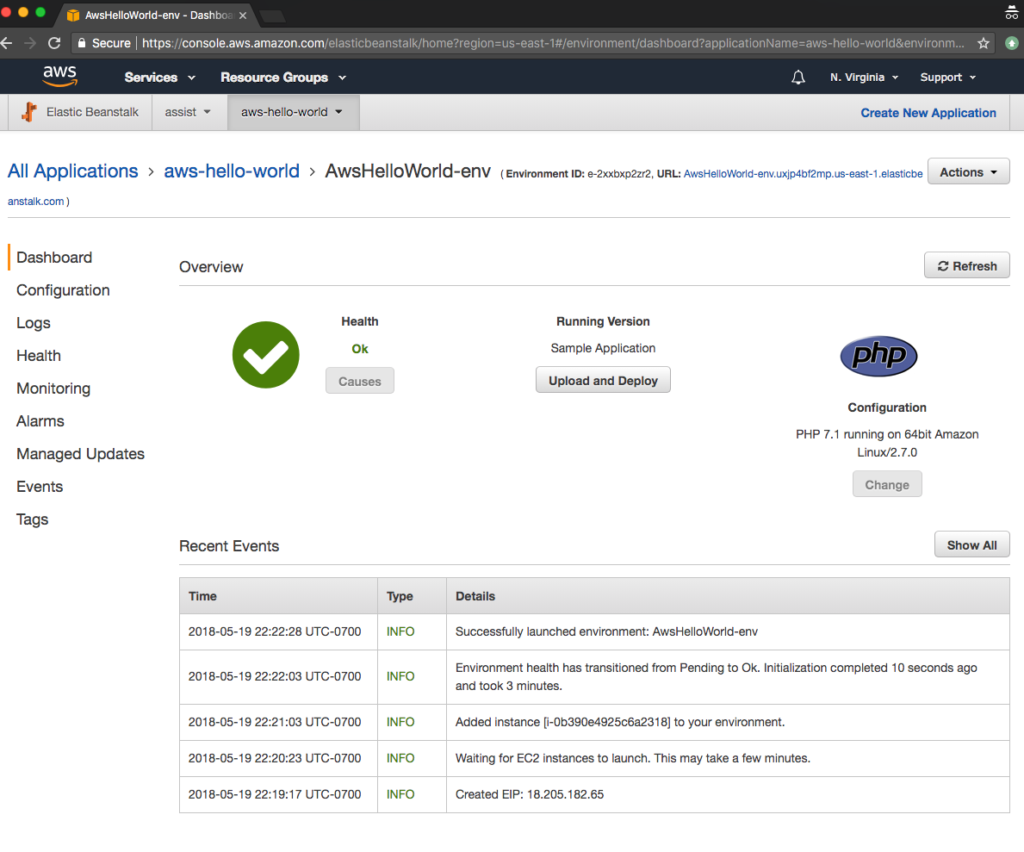
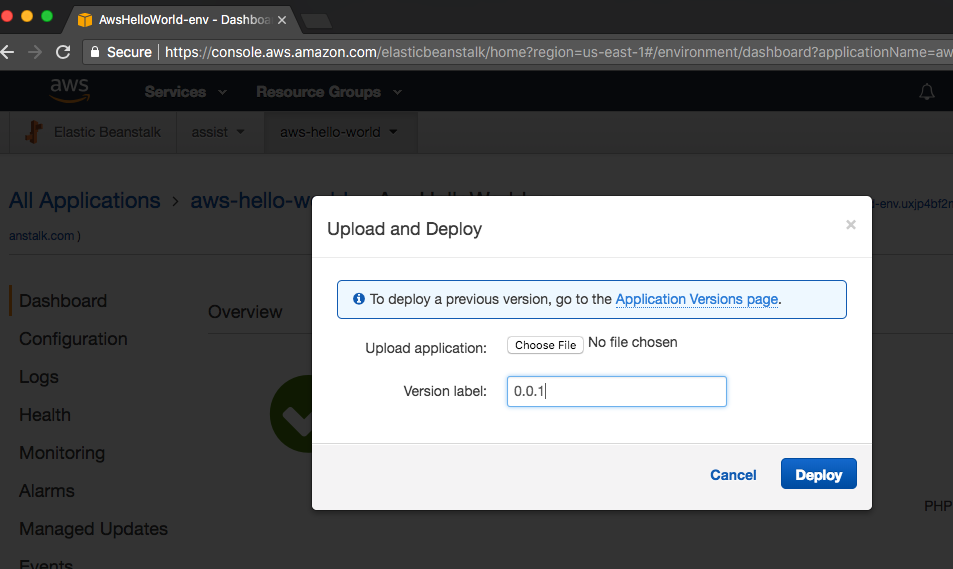
- Once a platform is chosen in step above, for Application code, you may choose Sample application. It may take a couple of minutes for Elastic Beanstalk to create the environment with above configuration. Once done, you can click on the URL next to the environment name to view the running application which is can be accessed publicly.
- From this point, you can continue making changes to your code. However, make sure when you deploy your code on Elastic Beanstalk, you upload properly by selecting all the contents inside the folder and then compressing the contents and not the folder itself. If you have a nested folder inside the zip, you may run into 403’s like I did.


AWS Elastic Beanstalk supports the following languages and development stacks:
- Apache Tomcat for Java applications
- Apache HTTP Server for PHP applications
- Apache HTTP Server for Python applications
- Nginx or Apache HTTP Server for Node.js applications
- Passenger or Puma for Ruby applications
- Microsoft IIS 7.5, 8.0, and 8.5 for .NET applications
- Java SE
- Docker
- Go
Although there is a bit of learning curve here with AWS, once done it makes super easy to connect with other AWS services and build a modern web app.